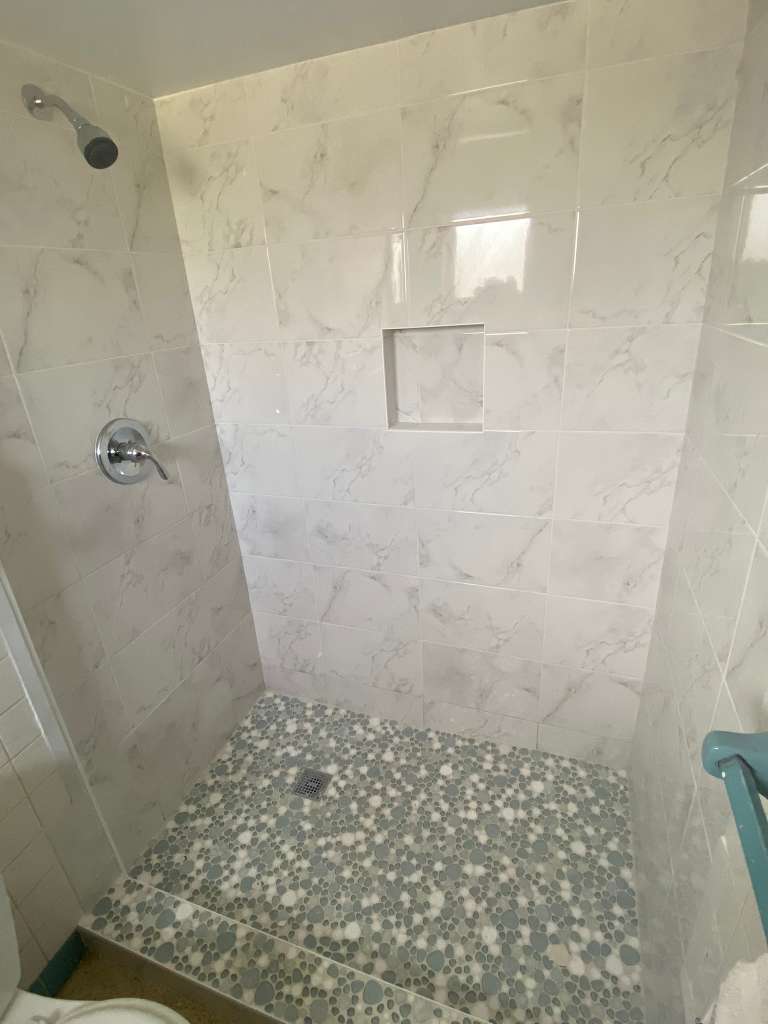

A shower niche is waterproofed by making it part of the shower’s continuous waterproofing system, not by counting on tile or grout to keep water out. The niche has to be built, sealed, and tied into the same membrane or waterproof backer system as the rest of the shower wall, because tile itself is not waterproof and grout can absorb moisture over time.
What a shower niche needs to do in a wet area
A shower niche looks simple, but it sits in one of the most vulnerable places in the whole shower wall. It interrupts the wall assembly, creates inside corners, and adds seams where leaks can start if the waterproofing is not detailed correctly.
In practice, waterproofing a niche means three things:
- The niche structure has to be solid and properly located.
- The waterproofing has to cover the niche completely.
- Every transition, corner, and penetration has to be sealed as part of one continuous system.
If you are asking, “how do you waterproof a shower niche?” the short answer is: you do it the same way you waterproof the rest of the shower, with a compatible system that stays continuous from wall to niche and back again.
Start with a rigid niche that is built the right way
Support matters before waterproofing begins
A niche should not flex, shift, or sit loosely in the wall. It needs to be framed or otherwise supported so the opening is rigid and positioned correctly. Prefabricated niche products often have very specific support and fastening requirements, and those instructions should be followed exactly.
That matters because waterproofing materials are only as dependable as the surface underneath them. If the niche moves, cracks can form in the membrane, corners, or tile finish.
Prefabricated and site-built niches are both possible
Homeowners often see two common approaches:
- Prefabricated niches that are made to work with a specific waterproofing system.
- Site-built niches framed into the wall and then waterproofed with a membrane or waterproof board.
Either way, the key is compatibility. The niche, backer, membrane, sealant, and tile-setting materials all need to work together as a system. Do not assume different brands or product types can be mixed without approval from the manufacturers.
Use a compatible waterproofing system from end to end
Tile is the finish, not the waterproofing layer
Tile helps protect the wall and gives the shower its look, but it is not the waterproof layer. The actual moisture barrier should be behind or directly under the tile, depending on the system being used.
That waterproofing layer must:
- Cover the niche walls, back, and face as required by the system.
- Tie into the surrounding shower wall waterproofing.
- Avoid gaps at the edges.
- Stay continuous through corners and seams.
In a shower, the niche is not a separate decorative box. It is part of the same wet-area assembly as the shower walls.
Match the niche to the rest of the shower assembly
A common mistake is choosing a niche product or membrane that is not approved for the backer board or wall system already in place. That can create weak points at the exact spot you most want to protect.
Before installation, confirm:
- Which backer board or waterproof board is being used.
- Which membrane is approved for that board.
- Whether the niche product is designed to integrate with that membrane.
- Whether the manufacturer requires tape, banding, corners, sealant, or a specific fastener detail.
If those details are not matched correctly, the waterproofing can fail even if the tile looks perfect on day one.
Seal the corners, seams, and transitions carefully
The niche-to-wall joint is the critical area
Most shower niche failures start at transitions, not in the middle of a tile field. The edge where the niche meets the shower wall is where water, movement, and changing temperature can all combine to create trouble.
Watch these areas closely:
- Inside corners of the niche
- Sidewall-to-niche joints
- Top and bottom transitions
- Corners where the niche frame changes plane
- Any seam where membrane pieces overlap
A continuous waterproofing strategy usually relies on preformed corners, waterproof banding, integrated flanges, or similar components to keep the membrane unbroken through these transitions.
Fasteners and cut edges need special attention
If the niche is installed in a way that requires screws, nails, or cut openings in the wall surface, those penetrations need to be addressed according to the system instructions. Fasteners are small, but they can become direct paths for moisture if they are not properly covered or sealed.
In general, the fewer unnecessary penetrations in the wet area, the better.
Caulk is not a substitute for waterproofing
Caulk can help seal joints at the surface, but it should not be treated as the only water protection for a niche. The waterproofing layer behind the tile has to do the real work.
That is why grout alone is never enough, and caulk alone is never enough. Both are part of the finish, not the entire moisture defense.
Follow the manufacturer instructions exactly
Why system instructions matter so much
Different waterproofing systems are designed differently. Some are sheet membranes, some are liquid-applied, and some use waterproof foam board or a prefabricated niche that is meant to be integrated into the wall system.
Because of that, the safest rule is simple: use the product exactly as intended by the manufacturer.
That means following details such as:
- Approved substrates and backer materials
- Overlap requirements
- Corner treatment
- Seam treatment
- Sealant type
- Drying or curing time before tile work continues
- Whether a flood test is recommended or required
If you mix methods without checking compatibility, you can create hidden leaks that do not show up until later.
Don’t rely on “close enough” in a wet area
A shower niche is one of those details where “almost right” can still be wrong. A membrane that stops short of an edge, a corner that is not sealed correctly, or a fastener left untreated can all become moisture problems later.
This is especially important in Southwest Florida, where indoor humidity is already high. A shower that is not properly waterproofed may keep trapping moisture behind the tile, which can raise the risk of staining, deterioration, and mold growth.
How a proper waterproofing sequence usually works
A typical best-practice approach
Exact steps vary by product, but a sound shower niche installation often follows this sequence:
- Frame or support the niche opening so it is rigid and correctly sized.
- Install the approved backer or waterproof board on the surrounding shower walls.
- Set the niche system or build the niche according to the approved method.
- Apply the waterproof membrane or integrated waterproof components over the niche and wall area.
- Seal seams, corners, and transitions with the matching system pieces or approved sealant.
- Treat all penetrations and cut edges as required by the system.
- Allow proper cure or dry time.
- Perform a flood test if the manufacturer or project scope calls for it.
- Install tile after the waterproofing has been verified.
This sequence is less about a single product and more about keeping the entire wet area continuous and intact.
Why a flood test can be worth it
A flood test is a practical way to confirm the shower receptor or wet-area waterproofing is holding before tile goes in. Where applicable, it gives you a chance to catch a problem early, when it is easier and less expensive to correct.
Not every shower detail is flood-tested the same way, and manufacturer instructions should guide the process. But when a test is appropriate, it can provide valuable peace of mind.
Common mistakes homeowners should avoid
Don’t assume grout and tile are waterproof
This is the biggest misconception. Tile and grout may resist water on the surface, but they do not stop water from reaching the assembly behind them. A shower niche must be waterproofed underneath the finish materials.
Don’t combine products without checking compatibility
A niche, membrane, and wall board may each be good products on their own, but that does not mean they are designed to work together. Always confirm the exact combination is approved by the manufacturers.
Don’t skip the niche edges
The niche opening, inner corners, and wall transition are where leaks usually begin. If those details are rushed, the system can fail even if the center of the niche looks fine.
Don’t cover up damage or movement
If the framing is soft, warped, or out of square, fix that before waterproofing. A membrane cannot compensate for a wall that moves or a niche that was built poorly.
Why this matters in Southwest Florida bathrooms
Humidity makes moisture control more important
In Southwest Florida, bathrooms already deal with warm, humid conditions. That makes a well-built shower assembly even more important, because any trapped moisture can linger longer than it would in a drier climate.
A properly waterproofed niche helps reduce the chance that water will migrate into the wall cavity, where it can lead to hidden damage or mold-related issues.
Remodeling details should fit the local environment
For local homeowners, the best shower details are the ones that respect moisture from the start. That usually means a true waterproofing system, careful niche transitions, and materials that are appropriate for a constantly wet space.
If you are planning a broader bathroom update, it can help to talk with a remodeler who understands wet-area detailing in Gulf Coast homes, such as bathroom remodel port charlotte fl.
When to bring in a pro
Some niche projects are straightforward, others are not
A shower niche may look like a small detail, but it often affects framing, waterproofing, tile layout, and finish work all at once. It may be reasonable to handle a simple replacement if the wall system is already designed for it, but more complex situations benefit from professional planning.
You may want help if:
- The shower is being rebuilt from the studs.
- The niche needs to be moved.
- You are changing wall systems or membrane types.
- There is existing moisture damage.
- The shower is part of a larger bathroom remodel.
If you are comparing remodeling options, our general contractor north port fl page is a helpful place to start.
The value of getting the details right early
Waterproofing mistakes are usually harder to fix after tile is installed. That is why the niche should be planned as part of the shower system from the beginning, not added as an afterthought.
FAQ
How do you waterproof a shower niche?
You waterproof it by making the niche part of the shower’s continuous waterproofing layer. That means the membrane or waterproof board covers the niche fully, ties into the surrounding shower walls, and seals all corners and transitions.
Is grout enough to waterproof a shower niche?
No. Grout is not waterproofing, and it should not be relied on to stop moisture from reaching the wall assembly behind the tile.
Can you use a prefabricated niche in any shower?
Not always. The niche has to be compatible with the wall system and installed exactly the way the manufacturer specifies.
What is the weakest part of a shower niche?
Usually the corners, seams, and transitions where the niche meets the shower wall. Those details need careful sealing.
Should a shower niche be flood-tested?
If the system instructions or project scope call for a flood test, yes. It can help verify the waterproofing before tile is installed.
Why is niche waterproofing especially important in Florida?
Because warm, humid conditions can make moisture problems worse if water gets behind the tile. A properly detailed waterproofing system helps reduce that risk.
Final takeaways for homeowners
A shower niche should never depend on tile or grout alone. It should be built as part of a continuous waterproofing system with solid support, compatible materials, sealed transitions, and careful attention to the edges and penetrations that are most likely to leak.
If you remember only one thing, make it this: the niche is not a separate feature from the shower waterproofing. It is part of the wet-area assembly.
For homeowners in Southwest Florida, that attention to detail matters even more because humidity and moisture exposure make shower failures more expensive to ignore. If you are planning a bathroom update and want to make sure the details are handled correctly, review the layout early, use approved products, and make waterproofing the priority before the tile ever goes up.
If you want more background on what can happen when water gets where it should not, see why shower grout keeps cracking Florida.